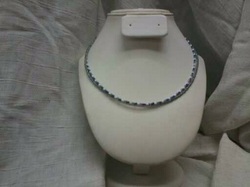
This is the first necklace I made. I used 18 gauge wire and clamped the ends together. I did a pattern of grey, blue and white glass beads. I really like the way glass beads look personally, I feel as if it looks more classy if you rather than regular plain beads. The second chain is just grey glass beads. I think this necklace is simple and could be added to about any outfit.
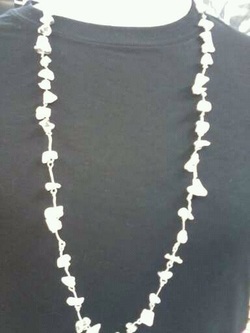
This is the second necklace I made. I did a loop then added a bead then looped it again. I put all the loops together by opening the loops but in a way it wouldn't ruin the lollipop shape. This is a longer necklace, so there is no need for a claspe. I personally like the long necklaces because they go better if you wear v-necks and don't make your neck look weird.
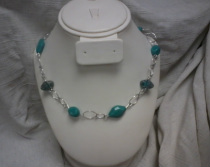
"Bluer than the Ocean" Fall 2012. I like this necklace because it can be long or short and its cute either way. I first took wire and made many figure "8's," I then made links with beads on them in a pattern of a big bead, a smaller one and a wooden type one with a figure 8 in between them. Lastly, I connected them all together. This necklace was very simple to make and yet looks a bit complex.
"McDonald's" Fall 2012. This necklace I made for my sister because she works a lot at McDonald's. I first drew the logo and glued it on a metal sheet square than was one inch squared. Next, I took the jewelers saw and cut it out. That step was a bit hard because sometimes the wire would break or I had a hard time cutting. After I was all done, I took sandpaper and smoothed it out. Next, I put red and yellow glass beads alternating on a wire. Lastly, I made a link to put the M on the necklace.

"Woven Beads" Fall 2012. This bracelet I really enjoy making. I feel they are more laid back and casual, and wearable on an everyday basis. I first start with taking two stings and then simply putting a button in the middle for a closure bead. I put a bead on two strings and knotted them. I did the same thing with the other two strings. I then put a bead in the middle. I just repeated the process until I came to a desirable length that fit my wrist. You can make this bracelet be more chunky if you just put the beads and knot them closer together. I personally like the chunkier look better. These bracelets make great friendship bracelets too!
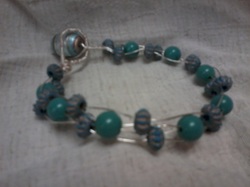
"Bluer than the Sea". Fall 2012. This is the second bracelet that I made. I particularly like this bracelet because its something you could wear casual or formal I suppose. I first took two arm-length pieces of wire. I then put a closure bead half way through so it could create four separate wires and I would have something to put the bracelet together to wear. I put a bead on two wires and another bead on the other two beads. I proceeded to put a bead on two wires that were in the middle of the four wires, so the innermost of the wires. I then just repeated the process until it fit my wrist. To make a loop for the closure bead, I took the longest of the wires and wrapped them around the shorter ones until it was big enough to make the right sized loop.
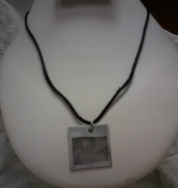
"Best Friends" Fall 2012. This necklace is a photo transfer necklace that I made for my best friend Abbey. I printed off pictures and put a special gel over them in 3 different directions. After it was all ready, I dampened the paper and rubbed it so I could transport the image onto the necklace, which was on a metal sheet that I sanded. This necklace has a picture of Abbey's grandma on one side and her and I on the other.
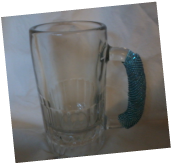
"Milk Mug" Fall 2012. This mug i peyote stitched the handle. First I just added a bead and looped through it at the bottom. Next, I just added beads until it fit around the hand. Afterwards, I went through every other bead that popped out and wasn't looped through twice and pulled through. I just continued this process until i reached my desired amount on the handle that i wanted done. Afterwards, I went through the beads instead of adding more to tighten it. I then just made knots. I like this because I put a lot of work in it and just overall like the effect it does.
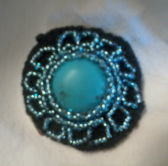
"Turquoise Flower" Winter 2012. This started to just be a button glued on a felt piece and paper. I did the peyote concept around the button, but went down under the button and up through the last bead every 4 or so beads. I did this so it would make the circle border around the button. I did a couple rows going up. Afterwards, I simply just made a flower design around it. To finish my button off, I went back and made another layer around the button. To tie it off, I made knots. I like this because the colors go together so well and makes a great embellishment. I ended up having it being a hair clip.
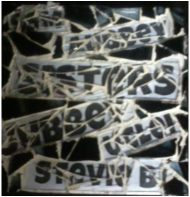
"Hidden Secrets" Winter 2013. This is a mosaic tile I made for my best friend. It has a lot of inside jokes on it. I first glued the words on the tile. Next, I just broke up clear glass and made a border around each word. Afterwards, I took more clear glass and glued it in the inside of the border. I had to make sure that I could still see the words though, too. After I was all done with that, I took black glass and filed in the rest of the tile the same way I did the words. The next day, I grouted it. When I finished the grouting process, I let it dry and then buffed it up with paper towel. I like this piece because it looks cool and it actually means sometime to my best friend and I.
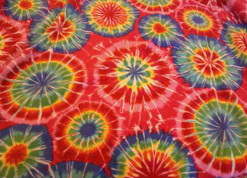
"Tie Blankie" Winter 2013. I went and bought fleece cloth that I liked. Next, I laid them on top of each other and cut strips about 5 inches long, that I would tie. When I was all done with cutting, I tied 2 knots in each strip. This made a cool effect and at the same time connected the blankets together. Blankets like this make awesome gifts and are just so soft and cuddly.
